Fluffy brows are having a major moment—and unlike the thick, blocky arches of the past, today’s take is all about fullness with a polished, feathered finish. One of the most popular ways to achieve the look is with brow lamination, a salon treatment that sets hairs in place for weeks at a time. But if you’d rather skip the appointment, you can easily mimic the effect at home with the right makeup techniques. Ahead, we’ll break down how to master the fluffy brow look and share some of our favorite products for the job.
Why Are Fluffy Eyebrows a Trend?
Beauty trends, just like fashion trends, are cyclical. For a while—specifically in the mid-to-late 2010s—the prevailing beauty trends often focused on creating the illusion of perfection (think airbrushed skin and flawlessly filled-in brows). But in recent years, the pendulum has swung the other way. Now, many beauty trends favor a more natural look, and fluffy brows fit into that category perfectly. When done right, fluffy eyebrows can frame your face, draw attention to your eyes, and make you look effortlessly put together—the perfect accompaniment to natural and statement makeup looks alike.
How To Get a Fluffy Brow Look at Home
Creating fuller-looking brows at home is pretty simple, provided you have the right tools on hand. Ahead, find our five-step fluffy brow routine and discover which products you’ll need to get the look.
Tools and products you’ll need
- Tweezers
- Brow scissors
- A clean spoolie brush
- Brow pencil or pen
- Clear brow gel
- Highlighter (optional)
Step 1: Start with shaping
While bushy eyebrows are a more natural look, you’ll often find that you need to do a little bit of shaping for them to look their best. Here’s how: First, use a clean spoolie to brush your brow hairs upward. Typically, most of your brow hairs will fall within a fairly well-defined area, but if you have thicker brows or haven’t groomed your brows in a while, you may also notice individual hairs further down your brow bone. Use your tweezers to remove these stray hairs, as well as any between your brows (in other words, the “unibrow” area). If you want to create a specific shape—such as a thinner tail or more defined arch—now’s the time to do that, too.
When you’re finished with tweezing, use brow scissors to trim any hairs that are too long—ideally, you want the hairs to be more or less uniform in length for a bushy but well-groomed look.
Step 2: Brush up your brows
Once you’ve finished grooming your brows to your liking, use your spoolie brush to push all of your brow hairs upward again. If you prefer a slightly more subtle look, you can also brush the hair out at an angle (toward your temple) rather than vertically upward.
Step 3: Fill in your eyebrows
Next comes the detail work—filling in your brows. If you don’t naturally have thick eyebrows, makeup is a must. First, find a brow pen or pencil in a shade that closely matches your natural brow color (if you’re stuck between two shades, opt for the lighter of the two—it’ll look more natural). Then, use your chosen shade to fill in sparse areas by drawing thin, hair-like strokes. You can also use your pen or pencil to add definition to your arches, lengthen the tail of your brow, or fluff up the front of your brows.
As for which brow product to use, we have a few great options. For a soft effect, we recommend our Fill & Fluff Eyebrow Pomade Pencil. The double-sided pencil features a teardrop-shaped tip on one end for drawing precise hairs, lining, shading, and filling, and a micro paddle brush on the other end for creating fluffy brows that look totally natural. Another great option is Lift & Snatch! Brow Tint Pen—it boasts a thin, precise micro-brush and is available in ten tinted yet buildable shades. And for those who prefer pencils, we suggest our Micro Brow Pencil. The skinny mechanical pencil boasts a creamy, pigmented formula and a thin tip for creating ultra-precise, hair-like strokes. There’s also a spoolie on the flip side of the pencil, making it a great multi-tasking product to add to your arsenal.
Step 4: Set with clear brow gel
At this point, your brows should be looking pretty great—and we’re guessing you’d like to keep them that way. That’s where brow gel comes in. Use The Brow Glue Crazy Lift Brow Lamination Gel to brush your brows into your desired position. For a natural look, we suggest combing the applicator upward through the front of your brows, then angling it slightly toward your temples as you brush it through the arch and tail. However, if you want ultra-fluffy eyebrows, you can also comb your brow hairs directly upward for a lifted, laminated effect. No matter which approach you choose, you’ll enjoy up to 24 hours of non-crunchy, flake-proof wear for your fluffy brow look.
Step 5: Highlight under your arches (optional)
Lastly, to make your brows pop, subtly highlight your brow bone just beneath your arches with the Buttermelt Highlighter. The slight shimmer will help draw attention to your brows and visually “lift” them up, making it the perfect finishing touch for your fluffy brow look.
Common Mistakes To Avoid
When creating fluffy brows, a careful approach is key—it’s important to strike the right balance between fullness and softness for a natural look. Here are a few common mistakes to avoid when doing your eyebrow makeup:
- Over-plucking: It can be easy to get carried away when plucking your brows, but it’s best to adopt a less-is-more approach. It’s difficult to create fluffy brows out of super-thin arches, and—more importantly—it can take quite a while for your brows to recover from an overzealous grooming session. Go slow, and assess your work as you go to ensure you’re removing the right amount of hair.
- Using the wrong shade to fill in your brows: When choosing a brow pencil or pen, it’s best to select a shade that closely matches your natural brow color rather than match it to your hair. If you’re stuck between two similar-looking shades, opt for the lighter of the two for a softer, subtler finish.
- Using a heavy hand: When filling in your brows, use light, feathered strokes. Pressing too hard on your brow pencil or pen will result in thick lines, creating a blocky, unnatural look.
- Using too much brow gel: Even the best brow gel can become flaky or sticky if you apply too much of it. Start with a small amount and build up your application from there. You can always layer on more product if you find you need a little extra shaping or hold for your fluffy brow look.
Next: 10 Makeup Tips To Make Eyes Look Bigger
Have you perfected your brow routine? We’d love to see the result. Share a pic on social media and tag us @nyxcosmetics.
PRODUCTS USED

THE BROW GLUE INSTANT BROW STYLER
Long-hold eyebrow glue
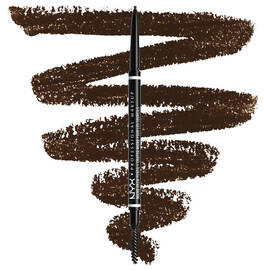
Micro Brow Pencil
Precise Eyebrow Pencil

The Brow Glue Crazy Lift Brow Lamination Gel
A 24-hour strong-hold brow lamination gel that delivers a non-crunchy, flake-proof, and sweat-resistant hold.

LIFT & SNATCH! BROW TINT PEN
Micro-brush tinted eyebrow pen

Fill & Fluff Eyebrow Pomade Pencil
Dual-ended eyebrow pencil

BUTTERMELT HIGHLIGHTER
Butter smooth glowy highlighter in eight shades.