

When you spend time perfecting your brows, you naturally want them to stay flawless all day—but the universe may not always be on your side. Sweat, humidity, rain, and even a dip in the pool can quickly cause brows to fade, smear, or lose their shape, no matter how carefully you filled them in. That’s why knowing how to waterproof eyebrows is a game-changer. Using long-lasting, sweat- and waterproof eyebrow makeup—whether pencils, pens, gels, or a combination—can help ensure your arches stay polished from morning workouts to late-night catch-ups with friends (even if the weather doesn’t cooperate). Ahead, we’ll share how to make your brows last through sweat, humidity, rain, and swimming with a simple four-step routine. Plus, we’ll introduce you to our favorite waterproof brow gels for the job. Keep reading for all the details.
How To Make Eyebrows Waterproof
The best way to achieve waterproof eyebrows is by using long-wearing, water- and sweatproof eyebrow products, such as waterproof pencils, pens, or brow mascaras. Brow makeup can bleed or fade due to your skin’s natural oils, sweat, water, and friction from touch or clothing. That’s why waterproof formulas, combined with proper setting steps, are essential—they create a protective barrier that locks your brow shape in place, even through workouts, humid days, or unexpected rain.
If your current brow products aren’t waterproof—and you don’t want to invest in an entirely new line-up—that’s okay. You can fill in or style your brows as usual and finish with a coat (or two) of The Brow Glue Crazy Lift Brow Lamination Gel, a long-wearing, clear brow gel that’s sweat-resistant, flake-proof, and provides up to 24 hours of hold without a sticky or crunchy feel.
Key ingredients to look for
When shopping for waterproof eyebrow products, check the label for ingredients that help lock brows in place, including:
- Film-forming waxes
- Smudge-proof polymers
- Long-lasting pigments (if tinted)
Common mistakes
Using waterproof eyebrow makeup is obviously essential for a long-lasting brow look, but it’s not the whole story. If you have oily skin or expect super humid or wet conditions, it’s equally important to take the time to prep and set your skin properly. Skipping these steps can allow oil, sweat, or moisture to break down your makeup, causing your brows to fade or smear. Finishing your routine with a waterproof setting spray, like The Face Glue Setting Spray, can add an extra layer of protection, helping to lock your brows—and the rest of your makeup—into place. Layering these steps ensures your arches stay polished until you’re ready to remove your makeup.
4 Steps for Sweat- and Water-Resistant Brows
Before your next gym session, beach day, or rainy night out, make sure your brows are ready to stay put. Here’s a simple step-by-step routine to get sweat-proof and waterproof eyebrows that go the distance.
Step 1: Start with an eyebrow pencil or pen
First, think about the shape and style you want your brows to be—whether that’s thin and arched, thick and fluffy, or something in between. Once you have your game plan, start filling in sparse areas and adding depth where you’d like more definition. For this step, we recommend using a long-lasting brow pencil or pen. When choosing a product, consider your skin type and environment: if your skin is oily or you expect heavy sweating, opt for formulas labeled “smudge-proof” and “water-resistant,” not just waterproof, to ensure your brows stay in place.
If you tend to favor pencils, the Micro Brow Pencil is an excellent pick. The waterproof eyebrow pencil boasts a super-skinny tip ideal for creating thin, hair-like strokes, and the ultra-pigmented formula comes in 12 shades to complement a range of hair colors. You can use it to darken your existing brows, draw faux micro-hairs in areas that need a bit of added density, or create a more defined brow shape. The Blade & Shade Nano Brow Pencil is another must-try, particularly if you’re after a more defined brow look.
For those who prefer brow pens, we recommend the Lift & Snatch! Brow Tint Pen. The pen’s flexible brush tip allows you to draw thin or thick lines, enabling you to fill in your arches any way you want. Additionally, the tinted formula is smudge-resistant and transfer-resistant and offers up to 16 hours of wear.
No matter which brow pencil or pen you choose, keep in mind that technique matters when filling in your brows. Use hair-like strokes to mimic natural brow hairs rather than just filling in large sections. Pay attention to the direction of your strokes—generally following the natural growth pattern—to create a more realistic look. For a polished finish, let the pencil or pen sit for about 30 seconds before moving to the next step, giving the product time to set.
Step 2: Shape and tame your arches
Once your brows are filled in to your liking, it’s time to shape and set them. The best way to do this is with a waterproof brow mascara, like The Brow Glue Instant Brow Styler, which provides up to 16 hours of non-sticky, flake-resistant hold.
Before applying, use a tissue or blotting paper to gently wipe away any oil or sweat around your brow bone—this small step helps the gel grip better and prevents sliding in humid or hot conditions. Then, choose the shade that best matches your natural arches (there are four to pick from) or opt for the clear version if you simply want to lock in your existing brow color.
To apply, uncap the gel and use the attached spoolie to brush through your brows. For a natural, softly defined look, brush in the direction of your natural brow pattern—typically upward and then outward toward the tail. If you prefer a more lifted, laminated effect (especially flattering on full brows), brush the hairs straight up, then lightly press them down with your fingertip or the flat side of the spoolie to hold them in place. This helps tame unruly hairs and maintain structure even in humid weather. One coat gives a light, defined finish; additional layers add more tint, volume, and hold.
Pro Tip: After brushing your brow gel, dust a touch of translucent setting powder just beneath your brow hairs to help absorb oil and keep everything locked in place.
Common mistakes
- Applying too many layers of gel, which can cause flaking or stiffness once dry.
- Using a non-waterproof or non-sweat-resistant formula and expecting it to hold through humidity or activity.
- Skipping oil removal beforehand—this can cause even the strongest gel to slip.
Step 3: Brush through with a waterproof brow gel
Next comes the hero of this routine: The Brow Glue Crazy Lift Brow Lamination Gel. This long-lasting formula provides our strongest hold yet and helps the brows stay put, even through heat, humidity, and movement.
To apply, use the built-in styling comb brush to sweep the clear gel through your brows in the same direction you styled them in step two. Start with a light coat and allow it to dry for about 10 to 20 seconds before adding a second layer if you need extra hold. This layering technique builds staying power without making your brows feel stiff or heavy.
Pro Tip: Avoid over-applying—the goal is flexible hold, not a crunchy finish. A small amount goes a long way toward keeping your brows perfectly set and weather-proof all day.
Step 4: Set your look
To finish, lock in your look with a waterproof setting spray, like The Face Glue Setting Spray. While your waterproof brow gel is designed to hold individual hairs in place, a setting spray helps seal the makeup underneath, keeping both your filled-in color and gel layers intact. Think of it as an invisible shield that protects your brows (and the rest of your face) from water, sweat, and humidity. Hold the spray about eight to ten inches from your face and mist evenly, allowing it to dry fully before touching your brows.
Maintenance and Removal Tips
Keeping your waterproof eyebrows looking fresh doesn’t end once you’ve applied your products. A little maintenance throughout the day—and proper removal at night—can go a long way in preserving your brows both immediately and in the long term.
Touch your brows up if needed
If you notice shine or sweat collecting around your brows throughout the day, gently blot the area with an oil-absorbing sheet. This helps remove excess oil without disturbing your makeup. To refresh your shape, brush on a light coat of clear brow gel for renewed hold and definition. And if you’ve been swimming or sweating, always pat your brows dry with a soft towel—never rub—to prevent lifting or smearing.
Remove makeup with an oil-based cleanser
Waterproof eyebrow makeup products are made to last, so they require a bit of extra care when it’s time to take them off. Use an oil-based cleanser or a dedicated waterproof makeup remover to break down long-wear formulas without tugging or scrubbing. For best results, let the remover sit on your brows for a few seconds before gently wiping them clean. If any product remains, use a clean spoolie to softly brush through your brows—just be careful not to pull on the hairs, as this can cause shedding over time.
Common Mistakes and How To Fix Them
Even with the best products, it’s easy to make small missteps that can interfere with your waterproof eyebrow look. Here are some of the most common mistakes—and simple ways to fix them—to keep your arches looking polished all day.
-
Mistake: Using a non-waterproof pencil and skipping a setting step
Fix: Always finish your brow routine with a waterproof gel or setting product to lock in color and shape. This final layer acts as a barrier against water, sweat, and friction. -
Mistake: Applying brow products on un-prepped, oily skin
Fix: Before filling in your brows, gently wipe the area with an alcohol-free cleansing wipe or lightly dust on a bit of translucent powder. This helps remove excess oil so your product adheres evenly and lasts longer. -
Mistake: Rubbing your brows after sweating or swimming
Fix: Instead of wiping, gently pat your brows dry with a soft towel or tissue. Once dry, reapply a thin layer of clear brow gel to restore hold and shine. -
Mistake: Choosing a brow shade that’s too dark and requiring heavy correction later
Fix: Select a tone that matches your hair color or is one shade lighter for the most natural effect. If your brows ever look too intense, softly brush through them with a clean spoolie to diffuse the pigment and blend the edges.
Best Situations and Scenarios for Sweatproof and Waterproof Brows
Whether you’re hitting the gym, heading to the beach, or just navigating a humid commute, waterproof eyebrows can keep you looking polished no matter what the day brings. Here’s how to adapt your routine to fit different conditions.
Gym sessions or high-intensity workouts
For active days, keep things lightweight and breathable. Use short, precise pencil or pen strokes to fill in sparse areas, then seal everything with an untinted waterproof brow gel. Skip heavy tints or thick layers—less product means less chance of smudging once you start sweating.
Beach or pool days
When you’ll be swimming or lounging in the sun, layer strategically. Apply your usual waterproof eyebrow pencil or pen, then top it with two light coats of clear waterproof gel, allowing a few seconds between layers to dry. Finish with a mist of waterproof setting spray for extra staying power. After swimming, gently pat your brows dry with a microfiber towel instead of rubbing to preserve your hold.
Rainy or humid weather
High humidity can make even the most precise brows lose their shape. To combat this, prep by blotting excess oil before application and choosing smudge-proof, water-resistant formulas. Brush through with waterproof brow gel to help the hairs stay in place and maintain structure, even in humid conditions.
Everyday commute
If your mornings involve walking, biking, or navigating public transit, a simple, low-maintenance approach works best. Use a smudge-proof brow pen for definition and lock it in with a single coat of clear waterproof brow gel. A quick mist of setting spray before you leave adds another layer of insurance against heat, humidity, and friction from hats or masks.
Next Up: How To Get Full, Fluffy Brows
Have you perfected your waterproof eyebrow routine? We’d love to see the results! Share a pic on social media and tag us @nyxcosmetics.
PRODUCTS USED

THE BROW GLUE INSTANT BROW STYLER
Long-hold eyebrow glue

The Brow Glue Crazy Lift Brow Lamination Gel
A 24-hour strong-hold brow lamination gel that delivers a non-crunchy, flake-proof, and sweat-resistant hold.
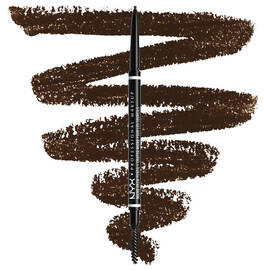
Micro Brow Pencil
Precise Eyebrow Pencil

LIFT & SNATCH! BROW TINT PEN
Micro-brush tinted eyebrow pen

Blade & Shade Nano Brow Pencil
Dual-edged brow pencil for precisely filled + naturally shaded brows in twelve colors
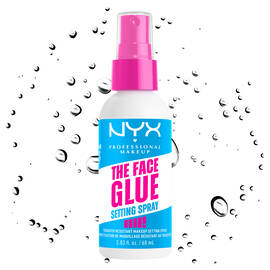
THE FACE GLUE SETTING SPRAY
Up to 24h makeup lock and shield, waterproof setting spray


