

We’ve all been there: You wake up, ready to face the day, only to be greeted by dark under-eye circles or a blemish once you take a look in the mirror. It can be frustrating, but it doesn’t need to be a day-ruiner. Learning how to apply concealer properly can help ensure that those surprise (and, let’s be real, unwanted) imperfections don’t keep you from rocking your desired makeup look.
Here, we’ll teach you exactly how to put on concealer to brighten your under-eyes, camouflage breakouts, even out redness, and more. Plus, you’ll discover our favorite concealer formulas for different skin types and learn how to incorporate them into your regular makeup routine.
What Does Concealer Do?
Before getting into the how, it helps to understand what concealer is actually used for. At its core, concealer is a targeted complexion product designed to correct, brighten, and add dimension exactly where you need it. Here are a few of the most common ways to use it:
- Brighten the under-eye area: Use a slightly lighter shade to help reduce the look of dark circles and make your eyes appear more awake.
- Cover blemishes: Apply a skin tone–matching shade to spot-conceal breakouts, dark spots, or uneven areas.
- Neutralize redness and discoloration: Use concealer (or a color-correcting shade underneath) to even out areas of redness or hyperpigmentation.
- Highlight and contour: Use a combination of lighter and deeper shades to sculpt, shape, and define your face.
If you’re not sure what concealer shade (or shades) you need for your intended purpose, we break down everything you need to know about finding your perfect match in How To Choose a Concealer Color for Natural-Looking Coverage.
Choosing the Right Concealer Formula
To apply concealer well, it’s important to start with the right formula and finish. The easiest way to narrow that down is by identifying your skin type—once you know whether your skin is dry, oily, or somewhere in between, it becomes much simpler to choose a concealer that will blend smoothly and wear well throughout the day.
If you have oily skin, look for a lightweight formula with a matte or natural finish to help offset unwanted shine. The Wonder Snatch Concealer is an excellent choice—it’s buildable, blendable, and has a natural-looking, soft matte finish. Plus, it provides up to 24 hours of wear for a flawless look that lasts.
For dry skin, we recommend opting for a hydrating formula that won’t settle into fine lines or emphasize uneven skin texture, such as the centella-infused Bare With Me Concealer Serum. Cream concealers, like the Pro Fix Stick Correcting Concealer, can also be a great option for those with drier or more textured skin.
How To Apply Concealer: A Step-by-Step Breakdown
Once you’ve found your ideal shade and formula, you can get started on your routine. Keep reading to learn how and where to apply concealer for an even, flawless-looking complexion.
Step 1: Prep your skin
Start by cleansing and moisturizing your skin—a hydrated base helps ensure your makeup applies smoothly and wears evenly. Once your moisturizer absorbs, begin your makeup routine by applying a long-lasting makeup primer, such as The Face Glue Gripping Primer. We love this formula because it grips makeup in place without a sticky or tacky feel and leaves the skin feeling hydrated for up to 24 hours.
Step 2: Apply foundation
Next, even out your complexion with a light layer of foundation (if you need a recommendation, the buildable Make ‘Em Wonder Soft Matte Buildable Foundation is an excellent pick). Applying foundation is optional, but doing so helps mask minor imperfections and gives your skin a smooth, even look. This, in turn, can help reduce the amount of concealer you need to use to achieve your desired look. If you don’t usually use foundation and need help finding a formula that fits your needs, check out our article Meet Your Match: How To Match Your Foundation and Find Your Formula for tips.
Step 3: Add concealer strategically
Once your base is in place, you can move on to applying your concealer. For long-lasting wear, we recommend opting for a waterproof formula that won’t settle into creases or fine lines, such as the Wonder Snatch Concealer. This lightweight liquid offers buildable coverage, feels breathable on the skin, and comes in 23 shades to match a wide range of skin tones and undertones.
Your concealer placement should be tailored to your specific needs, but there are a few key areas most people focus on:
- Under the eyes: Applying concealer beneath your eyes can help brighten and reduce the look of dark circles. For a subtle brightening effect, apply a small dab just beneath your tear trough. If you have prominent dark circles or want an extra-bright under-eye area, swipe concealer on in a small, upside-down triangle shape beneath each eye.
- Around the nose and mouth: If you have redness around your nose or mouth, a light layer of concealer can help mask discoloration and make your complexion look more even and uniform.
- On blemishes or dark spots: You can dab a small amount of concealer directly onto imperfections for targeted coverage that blends seamlessly into your foundation.
- High points of the face: For subtle highlighting, apply a slightly lighter concealer to the center of the forehead, bridge of the nose, and chin. This concealer placement helps add dimension to the face in a way that looks completely natural.
- Contours of the face: Concealer use isn’t limited to brightening and camouflaging. You can use a darker concealer to help define your features. Swipe a cool-toned concealer slightly darker than your skin tone beneath each cheekbone, along the bottom of your jawline, or on either side of your nose bridge to give your face a naturally sculpted look.
How To Blend Concealer Like a Pro
Knowing where to apply concealer is only half the battle—you also need to know how to blend it out properly. The technique matters, but so does the tool you use. The best option often comes down to personal preference and the formula you’re working with, since different tools can slightly change the finish and coverage.
- Sponge: If you’re after a natural, skin-like finish, a damp makeup sponge is a great choice. It helps sheer out the product and press it into the skin for a smooth, diffused look.
- Brush: For more precise application or fuller coverage, reach for a brush. It’s especially helpful for spot concealing or for targeting smaller areas where you don’t want to disrupt your foundation.
- Fingers: Your fingers work well in a pinch, and the warmth of your skin can help melt the concealer into place. This method is quick and effective, particularly for the under-eye area.
No matter which tool you choose, a few simple techniques can make all the difference. Gently tap the product into your skin rather than rubbing, which can move the concealer around or lift your base. Focus on blending the edges so everything melts seamlessly into your foundation, and build coverage in thin layers rather than applying too much at once to help prevent a thick or cakey-looking finish.
How To Set Concealer and Prevent Creasing
Once your concealer is blended, setting it properly can help lock everything in place and keep it looking smooth throughout the day.
Start by dabbing a lightweight setting powder, like the Wonder Snatch Loose Setting Powder, onto areas prone to creasing or shine. Use a powder puff or sponge to press the powder into your skin rather than sweeping it across the surface. This technique helps set the concealer without disturbing the coverage you just applied. If, after applying your powder, you feel that the area looks dry or one-dimensional, you can use a clean brush to sweep away any excess powder.
Then, mist your entire face with setting spray to help melt the layers together and lock in long-lasting wear. Use a matte setting spray if you prefer a shine-free finish, or opt for a radiant or dewy formula to give your skin a little bit of glow. For something in between, we love The Face Glue Setting Spray, which provides up to 24 hours of wear with a natural, your-skin-but-better finish.
Concealer Techniques for Different Goals
How you apply concealer can make just as much of a difference as the formula or shade you choose. Tweaking your technique based on the look you’re going for helps you get the most natural—or most glam—result.
For brightening under the eyes
To brighten the under-eye area, reach for a concealer that’s slightly lighter than your skin tone. Keep placement focused on the inner corner and use a minimal amount of product to avoid buildup. A little goes a long way here—blend well for a lifted, refreshed effect that still looks like skin. For added brightening, set your under-eye concealer with a color-correcting powder (like the Wonder Snatch Loose Setting Powder in Peach Posse or Banana Brat) rather than a translucent option.
For full-coverage glam
If you’re going for a more full-glam look, layering is key. Apply your concealer, then let it sit for a few seconds before blending—this allows the formula to thicken slightly for more coverage. Use a brush for added precision, especially when targeting specific areas or building up coverage exactly where you need it.
For a natural-looking finish
For a more natural, no-makeup makeup finish, skip full-face application and focus on spot concealing only where needed. Use a small amount of product to even out tone while letting your skin show through. You can also go easy on powder—or skip it altogether—to keep the finish fresh, dewy, and skin-like.
Next: Where To Put Highlighter: 9 Tips for a Lit-From-Within Look
Now that we’ve answered “Where do you put concealer?”, we want to see what you’ve learned in action. Share a pic of your beat on social and tag us @nyxcosmetics.
PRODUCTS USED

WONDER SNATCH™ CONCEALER
Up to 24HR Hydration, Waterproof, Fade-Resistant
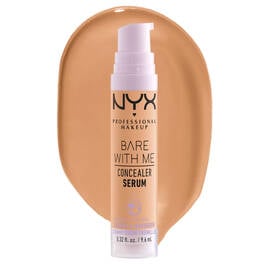
Bare With Me Concealer Serum
Medium-Coverage Hydrating Concealer for Face and Body

PRO FIX STICK CORRECTING CONCEALER
Color-correcting & buildable medium coverage concealer stick in 24 shades

THE FACE GLUE GRIPPING PRIMER
Up to 24h hydrating and gripping makeup prepping glue

Make ‘Em Wonder™ Soft Matte Buildable Foundation
Meet Make ’Em Wonder™ Soft Matte Foundation, a skincare-infused weightless foundation that delivers pro-level, buildable coverage with a real-skin finish for all-day comfort.
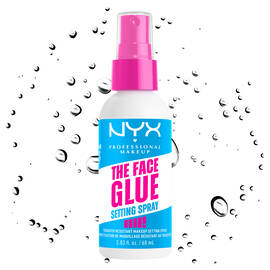
THE FACE GLUE SETTING SPRAY
Up to 24h makeup lock and shield, waterproof setting spray

Wonder Snatch™ Loose Setting Powder
A loose setting powder delivering up to 16 hours of sweat-proof wear and airbrushed skin perfection.


