

Prom is the last hurrah of high school before graduation, and planning for the big night takes a bit of work. You’ll need to choose a prom fit that shows off your personality, pick your perfect hairstyle, and find a prom makeup look that ties everything together. Many of this year’s biggest beauty trends—soft glam, glossy skin, statement liner, and bold blush— are perfect for standing out in photos and on the dance floor. But you also want your prom makeup look to last through dancing, selfies, sweat, and maybe even a few happy tears.
That’s where we come in. Ahead, we’ll teach you how to do your own prom makeup like a seasoned pro and share tips for balancing a bold eye or statement lip for a look that feels intentional—not overdone. We’ll also share some of our best tips for keeping your makeup intact throughout the night (because the last thing you want to be doing on prom night is worrying about touch-ups). So put on your dancing shoes, queue your favorite playlist, and get ready to craft a prom-ready look that keeps up with every move, photo, and unforgettable moment.
How To Make Prom Makeup Last All Night
The endurance of your prom makeup comes down to three key factors: how well you prep your skin, the formulas you use, and how you set your makeup. Using a primer to create a smooth base, using long-lasting makeup, and finishing with powder and setting spray are the most effective ways to help your look last. Keep reading for five prom makeup tips that make all the difference in keeping your look flawless all night.
1. Prep your skin well
Before applying any makeup, cleanse and moisturize your skin. Cleansing removes debris and creates a smooth surface for even makeup application, while moisturizing hydrates your skin to prevent makeup from clinging to dry patches. For the best results, choose skincare products that match your skin type: hydrating formulas for dry skin or shine-controlling options for oily or combination skin.
Give your products plenty of time to absorb before applying makeup, and consider practicing your full look ahead of prom night. This helps you see how each product layers together, ensuring your makeup sits well and lasts all evening.
2. Use a makeup primer
Once you’re ready to begin your makeup, smooth on makeup primer. This essential first step provides a base for your makeup to grip to, which can help it last longer and wear more evenly. Many primers offer additional benefits, such as smoothing or mattifying. For prom, we recommend opting for a long-lasting primer, such as The Face Glue Gripping Primer. It’s non-comedogenic, suitable for all skin types, and helps grip makeup in place for up to 24 hours without a sticky or tacky feel. Plus, it boasts a smooth, soft-focus finish that complements glowy and matte makeup looks equally well.
3. Opt for long-lasting, waterproof formulas
It may seem obvious, but when doing makeup for prom, you’ll want to opt for long-lasting formulas when possible. Long-wear products are designed to stay put through hours of activity and help prevent smudging or fading. Opt for waterproof formulas whenever possible to keep your look intact. For bold eyes, the Epic Inky Stix Creamy Mechanical Gel Eyeliner is among our top picks, as it wears for up to 24 hours without smudging or creasing. Be sure to use long-wear formulas for lips and brows as well, so your entire look stays polished from start to finish.
4. Set your base with setting powder
After finishing your face makeup, lock it in place with a loose setting powder, such as the Wonder Snatch Loose Setting Powder. Use a large, fluffy brush to lightly dust the powder over your face, focusing on your T-zone, where skin tends to be the oiliest. Let the powder sit while you finish your eye and lip makeup, then sweep away any excess with a clean brush. This technique helps prevent foundation from shifting, keeps your skin looking smooth, and reduces the chance of flashback in photos, so your prom look stays flawless under every camera and lighting situation.
Pro tip: Use a translucent setting powder to set your face, and a pink or peach-tinted powder to subtly color-correct and brighten your under-eye area.
5. Finish with setting spray
When your makeup is complete, lock it in with The Face Glue Setting Spray. This waterproof formula is designed to keep your makeup in place all night and delivers up to 24 hours of wear while feeling lightweight and breathable on the skin. Spritz it over your entire face at the end of your routine to help lock your makeup in place, limit transferring, and prevent your prom makeup look from fading throughout the night.
What Makeup Do You Need For Prom?
The exact products you need to perfect your prom makeup will depend on the look you’re going for, but here’s a general overview of the essentials you’ll likely want to have on hand:
- Makeup primer: A hydrating primer like The Face Glue Gripping Primer can create a smooth base for your makeup application and help your products last longer.
- Foundation: Choose a long-wear formula that matches your skin tone for even coverage. If you use self tanner, be sure to match your foundation to your body, too.
- Concealer: Opt for a waterproof concealer, such as the Wonder Snatch Concealer, to camouflage imperfections for a flawless-looking finish.
- Setting powder: A lightweight setting powder like the Wonder Snatch Loose Setting Powder can help set your makeup and minimize unwanted shine.
- Blush: A pop of color on the cheeks ties any makeup look together beautifully. For the most flattering finish, pick a shade that complements your skin tone and undertone.
- Eyeliner: Long-lasting eyeliner, such as the Epic Inky Stix Creamy Mechanical Gel Eyeliner, can be used to subtly define your eyes or create more dramatic eye makeup looks.
- Mascara: Choose a waterproof formula to keep smudging and transferring at bay.
- Lipstick or stain: For your lips, opt for a long-lasting lip color like the Lip Lingerie Lip Liner Stain to keep your color intact and minimize the need for touch-ups throughout the night.
- Setting spray: Finish with The Face Glue Setting Spray to lock in your look, prevent fading, and reduce transfer.
5 Long-Lasting Prom Makeup Ideas To Try
Whether you prefer a classic clean girl look or want to lean into something more trendy—think bold liner or plump, glossy lips—there’s a prom makeup look for you. These of-the-moment styles are designed to stay flawless through photos, dinner, and hours of dancing, so you can enjoy every moment without worrying about touch-ups.
1. Soft glam prom makeup
Embrace your beauty with a natural makeup look that lets you—and your outfit—really shine. Read our prom makeup tutorial below to see how to nail this chic, minimalist look.
Step 1. Prep your skin with primer
After cleansing and moisturizing, apply The Face Glue Gripping Primer to your face to prep your skin for makeup. Allow the hydrating formula adequate time to dry down and set before moving on with your makeup routine.
Step 2. Apply foundation and concealer
For a natural look, choose a buildable foundation rather than one with intense coverage. We love the Make ‘Em Wonder Soft Matte Buildable Foundation, as it’s infused with skincare ingredients (including hydrating hyaluronic acid) and provides up to 24 hours of waterproof wear without looking or feeling cakey. For concealer, the Wonder Snatch Concealer is an excellent pick. Apply it only to areas where you need additional coverage and blend well for a seamless finish.
Step 3. Add a flush of color with blush
Next, dab a liquid blush, like the Fat Cheeks Juicy Liquid Blush, onto your cheeks and blend with a sponge for a diffused finish. This formula boasts a dewy, fresh finish, perfect for more natural makeup looks.
Step 4. Use powder to mattify shine
Lightly dust the Wonder Snatch Loose Setting Powder over areas prone to shine, such as your nose, forehead, and chin. This sets your foundation, helps your makeup last, and keeps your skin looking smooth without making it look flat or cakey.
Step 5. Define your brows
Laminated brows are one of 2026’s biggest beauty trends, and the natural, fluffed-up look pairs perfectly with soft glam prom makeup. To get the look, lightly fill in sparse areas with a brow pencil or pen, then brush your brows up with The Brow Glue Crazy Lift Brow Lamination Gel.
Step 6. Add shimmer to your eyes
For a simple, luminous look, apply a shimmery, neutral-toned eyeshadow to your lids and blend with your finger for a soft wash of shimmer. Then, trace along your upper lash line with a gel or liquid eyeliner for a defined, wide-eyed look.
Step 7. Layer lip liner and lipstick
For a defined lip look that stays put throughout dinner, dancing, and gossip, fill in your pout with the Lip Lingerie Lip Liner Stain. Wear the long-lasting, transfer-proof formula alone for a matte lip look, or layer it under gloss for a shiny finish.
Step 8. Finish with setting spray
Finish with a generous mist of The Face Glue Setting Spray to prevent smudging, fading, and transferring so your prom makeup stays intact all night.
2. Simple prom makeup
If you usually prefer no-makeup-makeup, this simple prom makeup idea is perfect for you. It features a medium-coverage base, naturally filled-in brows, a touch of dewy blush, and just enough mascara to make your eyes pop. This approach is especially appealing for anyone doing their own prom makeup, since it’s easy to nail and doesn’t require any advanced techniques.
Step 1: Start with a sheer base
After priming your skin, apply a dewy foundation or skin tint, such as the Buttermelt Glaze Soft Glow Skin Tint SPF 30, to your face and blend it out with your fingers. Using your fingers rather than a sponge will help create a sheerer, more skin-like finish, which is perfect for a barely-there makeup look. For areas that need additional coverage, we recommend using the hydrating Bare With Me Concealer Serum.
Step 2: Tame your brows
Next, reach for a tinted brow gel, such as The Brow Glue Instant Brow Styler. Using the spoolie brush, work the buildable formula through your brows to create a subtle version of the trendy laminated brow look. If you’re not sure which shade to use, we suggest opting for one slightly lighter than your natural brow color to ensure a soft, natural-looking finish.
Step 3: Apply blush sparingly
Grab your favorite rosy blush and lightly apply it to the tops of your cheekbones, blending the pigment toward your temples. This should create a soft flush of color that looks natural—not overdone.
Step 4: Apply eyeliner and mascara
For this soft, understated prom makeup look, you can skip the eyeshadow—you don’t need it. We do, however, recommend defining your lashes with mascara to make your eyes pop. Try our On The Rise Volumizing Mascara. The unique formula lifts, curls, and lengthens your lashes to help make your eyes appear bigger—perfect for prom photos. For a little extra definition, use the Epic Inky Stix Creamy Mechanical Gel Eyeliner to tightline your eyes.
Step 5: Add lip color
Last but not least are the lips. Because this look is meant to be more natural, we recommend skipping lipstick and instead opting for a long-lasting lip stain, like the Lip I.V. Lip Gloss Stain. The unique formula starts with a glossy finish, but gradually wears to a soft, long-lasting stain. Choose a soft nude shade, like Drippin’ In Rose, for a your-lips-but-better look.
3. Full glam prom makeup
If you want more glam makeup for prom night—think bold eyes, sculpted cheeks, and flawless skin—follow this easy tutorial for a special occasion-worthy look.
Step 1: Smooth on a full-coverage foundation
The best foundation for prom depends on what you’re after—and if that’s a full glam look, you’ll want to reach for a matte formula. After priming your skin, apply the Make ‘Em Wonder Soft Matte Buildable Foundation, blending well to eliminate any harsh lines. Start with a light layer and build it up as needed until your skin looks smooth, even, and airbrushed. Follow up with concealer as needed to camouflage any lingering imperfections.
Step 2: Sculpt and bronze
After applying your foundation, define your features with the Wonder Stick Contour and Highlighter Stick.
Apply the deeper contour shade along your cheekbones, the sides of your nose, and around the perimeter of your face to add definition. To help your contour last longer, lightly set the sculpted areas with Wonder Snatch Loose Setting Powder. This keeps the cream formula in place and prevents it from fading or shifting.
Next, add warmth with Buttermelt Bronzer, sweeping it onto your cheekbones with a large, fluffy brush. Use any leftover product on the brush to softly blend along your hairline for a cohesive, sun-kissed effect.
Step 3: Apply highlighter
Next, illuminate the high points of your face with a shimmery highlighter, such as the Buttermelt Highlighter. Use a smaller brush to sweep the velvety formula along the tops of your cheekbones, down the bridge of your nose, beneath your brow bones, and anywhere you’d like to add a little luminosity.
Step 4: Create a dramatic wing
No glam look feels complete without eyeliner, and a wing pairs perfectly with the sculpted, “snatched” effect from your contour. Use the Epic Ink Waterproof Liquid Eyeliner to draw a thin line from the inner to outer corner of your eye, then flick it upward toward the tail of your brow to create a clean wing. Keep the line sleek or build it up for more drama, depending on your preference.
If you want a softer or bolder alternative, use the Epic Inky Stix Creamy Mechanical Gel Eyeliner to create a smoky lash-line look or a more graphic liner effect. Finish with a coat or two of mascara to define your lashes and complete the look.
Step 5: Set your look
Once you’re satisfied with your makeup, go ahead and lock it all in with The Face Glue Setting Spray. If you’re prone to shine, consider stashing some blotting papers in your prom bag so you can mattify your skin throughout the night without disrupting your makeup.
4. Colorful prom makeup
For a standout look, pair bright lids with bold liner, dramatic lashes, and a touch of sparkle for extra impact. When choosing your shades, consider complementing your dress color rather than matching it exactly—this helps create a more balanced, eye-catching look. Keep reading to learn how to do prom makeup that showcases your love of color.
Step 1: Apply your base makeup
Your eyes are the focus of this colorful look, but you’ll still want to start with a solid base. Prime your skin as usual and apply your go-to foundation, blush, and bronzer, taking care to use a light hand so your eyes remain the star of the show.
Step 2: Brush up your brows
Once you’ve completed your base, use The Brow Glue Crazy Lift Brow Lamination Gel to brush up your brows for a full, fluffy look. This long-wearing brow gel is perfect for prom night because it’s flake-free, non-crunchy, and offers up to 24 hours of wear.
Step 3: Liven up your lids
Now comes the fun part—adding color. To keep your monochrome makeup look feeling modern, pick an eyeshadow color that complements your dress (rather than matching it exactly). A pale pink eyeshadow, for example, goes perfectly with a brighter pink or magenta dress; if you’re wearing blue or purple, try experimenting with pastels in the same color family. If your dress is neutral—think black, silver, gold, or brown—you can pretty much rock any eye color you choose.
For those who prefer liquid eyeshadows, we recommend the Ultimate Glow Shots Liquid Eyeshadow—it comes in 21 bold, long-lasting shades, from soft pinks to rich jewel tones, all with a shimmery (but not glittery) finish. If powder eyeshadow is more your thing, pick up our Ultimate Shadow Palette in I Know That’s Bright or Paradise Shock and create a smoky eye or vibrant cut crease.
Alternatively, you can use eyeliner to incorporate a pop of color into your look. Creating a bold, colorful wing with the Epic Inky Stix Creamy Mechanical Gel Eyeliner is both low-effort and totally eye-catching–perfect for prom.
Step 4: Add false lashes
Last but not least come the lashes. You can apply mascara as usual, but for a bolder effect, try falsies. We love the Jumbo Lash! Vegan False Lashes for voluminous, defined fringe. Use the full strip for an ultra-dramatic look, or cut the strip in half and apply it only to the outer corner of each eye for a subtle cat eye effect.
5. Glittery prom makeup
Prom is, at its core, a party—and what better way to celebrate than with a little (or a lot) of sparkle? Below, find a tutorial for an on-trend sparkly prom makeup look sure to help you shine.
Step 1: Lay down your base
As with the rest of our prom makeup ideas, this glitter prom makeup look starts with a strong base. Because you’ll have so much shimmer on your lids, we recommend using matte face makeup. Start by prepping your skin with a blurring primer, then use a brush or sponge to even out your base with your favorite medium or full-coverage foundation (we recommend the Make ‘Em Wonder Soft Matte Buildable Foundation).
Step 2: Apply your shimmery eyeshadow
The centerpiece of this prom makeup look is an unapologetically glam, shimmery eye. And for that, you’ll need our Ultimate Glow Shots Liquid Eyeshadow. Choose your favorite shade from the lineup and apply it all over your lids, using a clean blending brush to soften any harsh edges. Then, use an eyeliner brush to apply the same hue to your lower lash line for added shimmer. You can stop here—or you can use your finger to tap loose glitter onto the center of your lid for extra sparkle.
Step 3: Add eyeliner
Next, define your upper lash line with a long-wearing liquid eyeliner, such as the Vivid Matte Liquid Liner. Use the liner’s precision tip to simply line your upper lash line, create a soft cat eye, or add some oomph to your glitter makeup look with a dramatic, out-to-there wing. Or, add even more shimmer with one of the metallic shades of the Epic Inky Stix Creamy Mechanical Gel Eyeliner (we’re especially fond of Silver Shock).
Step 4: Finish with a glittery lip gloss
Round out your glam, glitter-packed look with an equally sparkly lip gloss. Try the Butter Gloss Non-Sticky Lip Gloss in Bring the Bling for a hint of color (but tons of non-sticky shimmer and shine).
Tips For Doing Your Own Prom Makeup
Doing your own prom makeup can give you full control over your look—and with a little planning, it can turn out just as polished as a professional application. Keep these tips in mind to ensure everything goes smoothly on the big night:
- Practice your look beforehand: Test your full makeup look ahead of time to make sure your products layer well and you’re confident in your technique.
- Do your makeup in natural lighting: Applying makeup in daylight helps you see true color and blending, so your look translates well in photos.
- Choose either bold eyes or bold lips: Focusing on one statement feature keeps your look balanced and cohesive.
- Bring a touch-up kit: Pack essentials like lip product, powder, and blotting papers for quick refreshes throughout the night.
- Take a flash photo: Snap a quick picture with flash before you leave to check for flashback or uneven blending.
Makeup Mistakes To Avoid On Prom Night
1. Applying makeup too soon after skincare
Products need time to absorb—if you get started on your makeup right after moisturizing, you run the risk of getting a patchy or uneven finish. To help your prom makeup last longer, wait a few minutes between completing your skincare routine and starting to apply makeup. It’s also best to let each layer of makeup settle before getting to work on the next.
2. Skipping makeup primer
As we said, primer is a must. Face primer helps the skin grip makeup, allowing it to last longer and stay fresh-looking. For a long-lasting finish that feels comfortable on the skin, try The Face Glue Gripping Primer.
3. Not setting your base
Powder, particularly setting powder, can help lock in liquid makeup (like foundation) so it’s even-looking and budge-proof. For a look that lasts all night, seal in your liquid makeup with a translucent setting powder, like the Wonder Snatch Loose Setting Powder.
4. Forgoing setting spray
For last-all-night makeup, long-wear setting spray is a must. You can even spritz a bit of setting spray onto your face between each step for extra insurance against fading, smudging, and transferring. For extra longevity, use a waterproof formula, such as The Face Glue Setting Spray.
5. Touching your face
The combination of the warmth from your fingers and your skin’s natural oils can interfere with your makeup and cause it to melt or smudge. Hands off!
6. Not blotting your skin
Oil is one of the main reasons why makeup breaks down. If you have oily skin, stash some blotting papers in your bag—you can use them to absorb oil throughout the night without disturbing your makeup.
7. Forgetting touch-ups
If you want your prom makeup to look picture-perfect all night long, touch-ups are a must. Make sure to use a makeup sponge, rather than a brush, for touch-ups—they can help absorb oil and keep your skin looking fresh for photos.
Next up: How To Underpaint Makeup for a Natural Sculpted Look.
Prom night only happens once (or twice, if you’re lucky). We want to see how you glam up for the big night! Share a pic of your prom makeup look on social and tag us @nyxcosmetics.
Shop Prom Makeup

THE FACE GLUE GRIPPING PRIMER
Up to 24h hydrating and gripping makeup prepping glue

Epic Inky Stix Creamy Mechanical Gel Eyeliner
A 24-hour cream gel eyeliner pencil featuring a precise slanted tip for effortless application with rich, 1-swipe pigment.

Wonder Snatch™ Loose Setting Powder
A loose setting powder delivering up to 16 hours of sweat-proof wear and airbrushed skin perfection.
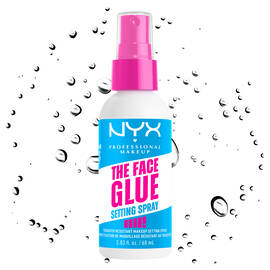
THE FACE GLUE SETTING SPRAY
Up to 24h makeup lock and shield, waterproof setting spray

WONDER SNATCH™ CONCEALER
Up to 24HR Hydration, Waterproof, Fade-Resistant
Lip Lingerie Lip Liner Stain
Ballpoint felt tip lip liner for precise, no-bleed nude perfection in twelve shades

Make ‘Em Wonder™ Soft Matte Buildable Foundation
Meet Make ’Em Wonder™ Soft Matte Foundation, a skincare-infused weightless foundation that delivers pro-level, buildable coverage with a real-skin finish for all-day comfort.

Fat Cheeks Juicy Liquid Blush
Get juicy, hydrated cheeks with a 24H hydrating liquid blush for a healthy, dewy glow.

The Brow Glue Crazy Lift Brow Lamination Gel
A 24-hour strong-hold brow lamination gel that delivers a non-crunchy, flake-proof, and sweat-resistant hold.

BUTTERMELT GLAZE SOFT GLOW SKIN TINT SPF 30
A skin tint with a soft glow glazed finish in ten flexible shades
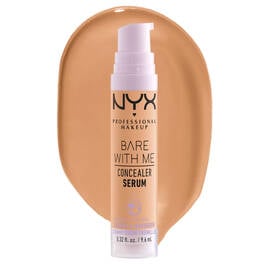
Bare With Me Concealer Serum
Medium-Coverage Hydrating Concealer for Face and Body

THE BROW GLUE INSTANT BROW STYLER
Long-hold eyebrow glue

On The Rise Volume Liftscara
Lifting & Volumizing Mascara

Lip I.V. Hydrating Lip Gloss Stain
Lip gloss + long-lasting lip stain in 20 shades.

Wonder™ Stick Contour and Highlighter Stick
Two-In-One Cream Contour Stick and Highlighter Stick
.jpg?sw=270&sfrm=jpg&q=70)
Buttermelt Bronzer
High pigment, true-to-skin buttery powder bronzer. Fade & transfer resistant with up to 12HR wear.
.jpg?sw=270&sfrm=jpg&q=70)
Epic Ink Waterproof Liquid Eyeliner
Waterproof felt-tip liquid eyeliner pen

BUTTERMELT HIGHLIGHTER
Butter smooth glowy highlighter in eight shades.
.jpg?sw=270&sfrm=jpg&q=70)
Ultimate Glow Shots Liquid Eyeshadow
Liquid Shimmery Eyeshadow

Jumbo Lash! Vegan False Eyelashes
Naturally Voluminous Re-Usable Vegan False Lashes

ULTIMATE SHADOW PALETTE
Pro-Level 16 pan Palette

Butter Gloss Non-Sticky Lip Gloss
Fan Fave Buttery Gloss


